About Me

Tuesday, May 31, 2011

(Not -So-)Transitional Rye Bread

I wanted to make a sandwich bread and use up some rye flour and buttermilk I had. Naturally Peter Reinhart's Rye Meteil bread came to mind. I made it in January with a mother starter. I don't have a mother starter now and I couldn't find any useful information about the much talked about biga method to make this bread. The Transitional Rye Sandwich Bread (TRSB) described in this book uses a biga with buttermilk. I have made it a couple times in the past (before I started blogging) with decent success. I thought I was proficient enough to adapt that recipe to make it whole grain (turns out, I'm not).

Soaker and biga
The TSRB soaker uses rye, buttermilk and salt. I didn't have enough rye, so I used whole wheat flour for the rest. My soaker looked like this:
150 g: Rye flour
  77 g: Whole wheat flour
    4 g: Salt
176 g: Buttermilk (extra 6 g by mistake)

My biga looked thus:
227 g: Whole wheat flour
   6 g: (1½ t) Vital wheat gluten
  ¼  t: Instant yeast
160 g: Water

The final dough
I decided to use the onions and caraway seeds as suggested in the Rye Meteil recipe. From the notes from my previous attempt, I decided to use the molasses and skip the honey.

The added ingredients:
128 g: Onion, chopped
    1 t: Caraway seeds (That's all I had, I could have used 2 t like the book said)
    6 g: Instant yeast
    5 g: Salt
  28 g: Whole wheat flour
Additional about 1 T whole wheat flour during kneading.

Ingredients on baking day

Added together epoxy-style

 Kneading and rising
This is one sticky dough, breads with rye flour usually are. I would add a small quantity of flour to help but 15 seconds later the dough would be just as sticky again. The poor rounding below is the result of that.

Sticky dough ready for first rise

For having added a little less yeast than specified, the dough rose really well. (Yes, it is very warm in the house these days)

Rose very well, fairly quickly

I didn't want to risk rounding and resting, so I shaped right away...

Shaped and ready for proofing

The dough rose like there was no tomorrow. I was baking another bread (next post) at the same time and the super fast rise of this bread threw off my timing projections. I had to then bake both breads 10 minutes apart.

Proofed well... too much?

The bread
I did get a tiny bit of oven spring. The loaf stuck to the sides of the pan. After letting it sit for 5-10 minutes, I had to use the silicone spatula (more firmly than I would have liked) to free the sides. I was quite afraid that the bread would come out in chunks...

Out of the oven (and stuck to the pan)

. .. but it behaved, and came out in one piece. The loaf pan was not as clean as usual, but I'll allow that.

Burnt bits of onion

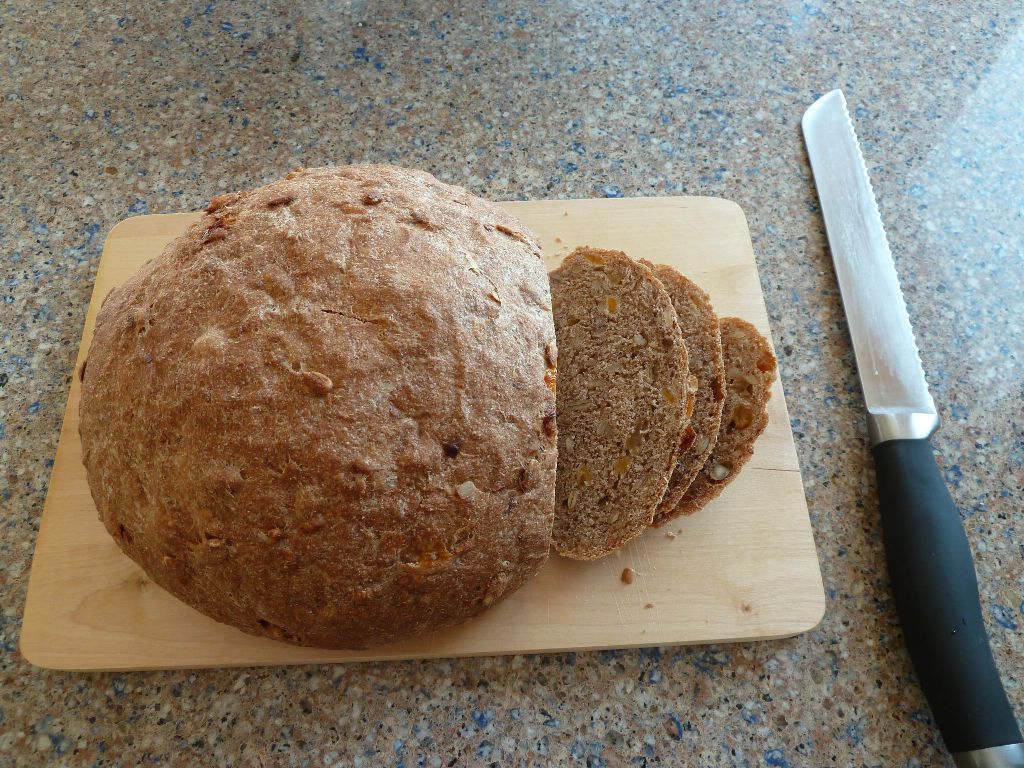
I had to slice this bread before it had completely cooled, so I could take some slices over to my in-laws' place to share at dinner. I had to make fairly thick slices to keep them from falling apart. So much for wanting a good sandwich bread!

Thick slices

Loose crumb that fell apart easily

Notes
Date: May 29, 2011
Recipe: Adapted from Transitional Rye Sandwich Bread and Rye Sandwich Meteil recipes from Peter Reinhart's Whole Grain Breads

Flours: Whole wheat flour, rye flour
Bread specific ingredients: Chopped onions, caraway seeds, vital wheat gluten
Sweetener used: Molasses
Liquid: Buttermilk and water

First rise time: 70 minutes
Proofing time: Just under 40 minutes
Comments: See composition in the description above.This was edible, actually nothing was wrong with the taste at all, just that it made lousy slices and I consider good slicing an important measure of success. So much for a few good sandwich lunches. I need to either understand the chemistry of dough better or simply stick to following recipes obediently. Sigh!

-RPH

Thursday, May 26, 2011

Transitional German-Style Many Seed Bread 02

OR Baking Off-Site

This was an experience of a different kind. We were going to spend five days at my in-laws' vacation beach house on the Oregon coast. I thought it would be fun to have fresh baked bread to snack on. I wanted to bake a bread that could be eaten by itself and be hearty. The best one of that kind in my repertoire is Peter Reinhart's Transitional German-Style Many Seed Bread. (The previous attempt had accompanied us to Disneyland). Also, I could put together all the dry ingredients at home and I would only need water to make the soaker, biga and the final dough. Perfect!

Ingredients
I was ready to experiment with the ingredients a little. I wanted to make it more whole grain and add some dried fruit to add moisture and sweetness. I replaced most of the bread flour with whole wheat flour and used some all purpose flour for the rest of the measure. While putting together the soaker, I added sugar mistaking it for salt. I had to leave it in and add the salt. I reduced the sweetener quantity in the final dough hoping it wouldn't affect the soaking chemistry. This was the final composition of the soaker: 170 g whole wheat flour, 57 g rye flour, 11 g flaxseed (instead of 7) , 5 g salt, 4 g sugar (added by mistake). The biga was made of 170 g whole wheat flour, 7 g vital wheat gluten, 50 g all purpose flour, 0.25 t yeast. The dough had 50 g sunflower seeds, 50 g pepitas, 40 g, raisins, 40 g chopped apricots, 33 g chopped walnuts, 18 g sugar.  The other (regular) ingredients for the final dough were 56 g whole wheat flour, 7 g yeast, 5 g salt. Note that the combined weight of the seeds and nuts was quite a bit greater than specified in the book.

The wonderful kitchen at the beach house overlooking the ocean

The soaker, biga, and final dough ingredients carried in packets

Soaker and biga put together the first evening

I added about 2 teaspoons of olive oil so the bread would stay fresh longer. I also had to add a couple tablespoonfuls of water to get the right consistency for the dough.

Putting together the dough

Ready for first rise

After the first rise

After the first rise, I needed to delay baking, so I rounded and rested the dough for about half an hour. In the cooler temperature this wasn't too much.

Free form loaf in the absence of a loaf pan.

Proofed and ready for the oven

Baking
This was my first attempt baking with a convection oven, so I set the temperature at 325° F for 35 minutes (instead of 375° F for 35 - 45 minutes). However at the end of 35 minutes it didn't look done, so I put it back in at 350° F for another 10 minutes which seemed to do the trick. (I missed my digital thermometer) I used the steam pan method suggested in the book but I wonder if starting out at the low temperature dried out the bread.

Cooling on a makeshift cooking rack

Sliced thin quite nicely

Love the seeds and nuts in the crumb

The bread
The bread sliced thin quite nicely and tasted pretty darn good. I love the taste of the apricot bits in the bread. It was good toasted and spread with strawberry jam. Not a bread for savory sandwiches, but a good hearty snacking bread. It is somewhere between a holiday bread and a plainer seed bread.

Notes
Date: May 19, 2011
Recipe: Transitional German-Style Many Seed Bread from Peter Reinhart's Whole Grain Breads

Flours: Whole wheat flour, rye flour, all purpose flour
Bread specific ingredients: pumpkin seeds, sunflower seeds, walnuts, golden raisins, dried apricots, flaxseeds (vital wheat gluten)
Sweetener used: Table sugar
Liquid: Water

First rise time: 105 minutes, followed by rounding and 30 minutes of resting
Proofing time: 70 minutes
Comments: See description above for measures. Added water and a little oil to get ingredients together. Need to learn more about baking in convection oven. Careful carrying flours through airport security next time. TSA officials might look at them suspiciously and want to put them through additional scanners.

-RPH

Thursday, May 19, 2011

Dinner Rolls for Aunt Agatha

That is the name of the recipe for pull apart dinner rolls in Laurel Robertson's bread book. In my case, they were going to be dinner rolls to go with an Indian dish called Pav bhaji for visiting relatives. I wanted to make them the evening before my guests arrived for the weekend. The book described how this could be done as a brown-and-serve version. Score!

The dough
The recipes calls for high gluten whole wheat flour. I normally add some vital wheat gluten to regular whole wheat flour to make high gluten whole wheat flour. However I didn't want to risk gummy-ness from the v.w.g. Also because this was for guests who may not be used to wholegrain dinner rolls, I decided to use some bread flour. I used 250 g of bread flour and 500 g of whole wheat flour. The recipe also calls for 150 g for whole wheat pastry flour. Salt is added to the flour mixture.

The setup

The softness of the rolls comes from the use of an egg and some buttermilk. Honey is the sweetener used. Indian dinner rolls are not sweet, so I only used 2 instead of 3 tablespoons. The three ingredients are mixed together. Yeast is dissolved in a cup of warm water to make the second liquid component added.

Liquids ready to go into the flours

The dough was kneaded for 12 minutes and then butter was smeared on the working surface little by little and kneaded into the dough. The recipe calls for 56 g of butter. I only had 45 g at hand, so I added 1 tablespoon oil to the buttermilk+egg+honey mixture.

The risings
The dough rose exceptionally well and very quickly, another sign that summer has arrived to Arizona.

Ready for the first rise

First rise is done

After the first rise, the dough was deflated, rounded and left to rise again.

Ready for the second rise

Second rise is done

The shaping
After the second rise, the dough was split into 4 equal parts. The total dough was 1592 grams. I was happy to have a digital scale to make sure my pieces very close in weight.

Dough is divided into four parts, rounded and rested

After resting the four balls of dough for a bit, each is split into six parts that are rounded into rolls and placed half an inch apart, ideally on a thick 11 x 16 aluminum bun pan or one 9 x 13 and one 8 x 8 Pyrex dish or a large cookie sheet. I went with the cookie sheet option. I kept the rolls covered with a damp paper towel while other rolls were being shaped.

Each of the four parts makes six rolls.

LR suggests a quick proof to keep the rolls from drying. I kept the paper towels under the clear plastic wrap throughout the proofing time.

Ready for proofing

When they were done proofing, the rolls touched each other and I knew they would look like the pull apart rolls I wanted to have.

Wonderfully proofed

The first bake
In a two stage baking process, the rolls are cooked but not browned in the first stage by baking them at 275 F for 30 minutes. There was some oven spring but no browning, so that in the picture is it hard to tell that they are semi-baked.

First half of the baking (evening before)

The second bake
The second bake is done for 15 minutes in a 450 F oven. This browned them just right for serving. I dabbed a little butter on them right as they came out (after this picture was taken)

Second half of the baking, right before dinner

Pav bhaji is usually eaten with the pav (bread) split in half (and toasted with more butter) as shown in the picture. I tested a left over roll with PB&J (gotta do that test!) and I thought it was good.

Decent crumb

Notes
Date: May13, 2011
Recipe: Dinner Rolls for Aunt Agatha from Laurel Robertson's book, 'The Laurel's Kitchen Bread Book'

Flours: Whole wheat, bread flour
Bread specific ingredients: Egg
Sweetener used: Honey
Liquid: Buttermilk and water

Comments: Used some bread flour to make rolls acceptable for company, but 100% whole wheat might be fine too. 2 T of honey was quite sufficient. I wonder if the butter amount can be reduced without compromising softness. Maybe replace some more butter with oil next time. All in all, a successful first attempt at dinner rolls and also the two-stage baking method, which made it possible to spend time with guests and still be able to serve home-made bread.

-RPH

Monday, May 16, 2011

Multigrain Struan 03

It was time for another Multigrain Struan attempt based on Peter Reinhart's recipe in Whole Grain Breads. See this and this for previous attempts.

Soaker
This was the final composition of the soaker.
56.5 g : Whole wheat flour
4 g salt

100 g: Brown rice, cooked
10 g: Flax seeds, ground
20 g: Amaranth seeds
30 g: Rolled oats
20 g: Barley flour
30 g: Yogurt
116 g: Milk (excess 6 g)

The soaker was quite a bit wetter than I meant it to be

The dough
I had to add quite a bit of flour to the final dough to make up for the wet soaker. After baking for so many months, I was not afraid to do that until the dough felt right.

Kneaded dough ready for the first rise

After a good first rise

Shaped and ready for proofing


Proofed

Slashed

Baked (with some over spring) and glazed with butter

Sliced well

The crumb

The bread
The bread baked and later sliced well. The brown rice grains remain whole in the kneading and baking process and are clearly visible in the crumb. The amaranth seeds make pretty speckles on the crust. Its not a bread for jam or nut butters, it's supposed to be more of a sandwich bread. However, some of the sandwiches we made didn't hold very well. The bread tasted good though.

Notes
Date: April 30, 2011
Recipe: Multigrain Struan from Peter Reinhart's Whole Grain Breads

Flours: Whole wheat flour
Bread specific ingredients: Brown rice (cooked), rolled oats, flaxseeds, amaranth, barley flour Sweetener used: Honey
Liquid: Yogurt and milk

First rise time: 70 minutes
Proofing time: 60 minutes
Comments: This is a great recipe to add different grains to a bread, but that does mean that finding a winning formula is going to be hit or miss.

-RPH

Monday, May 9, 2011

No-knead Ciabatta 02

In response to my first attempt of the No-knead Ciabatta bread, some blog readers mentioned Jim Lahey's method. I didn't have a dutch oven then, but I do now, so I was excited to try the recipe again, this time with some more whole grains. I used the recipe as given here but changed the flours a bit.

210 g: Whole wheat flour
206 g: All purpose flour
0.25 tsp instant yeast 
And then I made a possibly wrong move. I added 4g of vital wheat gluten to help with the rise. Also, I started adding water (by weight) and then noticed that my digital scale was showing Err (for error), so I did some guessing to make about 369 grams of water

Since the link gives the directions, here's my version in pictures:

Mixed at 9:30 pm

At 8:30 am after sitting overnight on the counter

At 2:30 pm ready to move on

Turned out on plastic wrap and sprinkled with some flour

After 4 folds, covered in plastic wrap to rest for 15 mins

Based on information I read on thefreshloaf, I decided to proof the dough on parchment paper in a bowl the same size as my cast iron pan

Before proofing

Proofed dough placed in a preheated cast iron pan and dusted with oat bran

The dough was baked in an oven pre-heated to 450 F and then lowered to 425 F. The pan was covered with the cast iron skillet for the first 15 minutes and the lid was taken off for the last 25 minutes.

Out of the oven

Out of the pan, the shape of the parchment paper folds clearly seen.

Irregularly shaped bottom

Sliced.

Irregular holes

This was the May bread for my father-in-law.


Notes
Date: April 30, 2011
Recipe: No-knead Ciabatta from this website

Flours: All purpose flour, whole wheat flour
Bread specific ingredients: None
Sweetener used: None
Liquid: Water

Long ferment: 17 hours at room temperature
Proofing time: 15 minutes of rest followed by two hours of proofing.
Comments: I only tasted one slice of the bread about 2 hours after it was out of the oven and I thought it was a tad gummy. I think it was the vital wheat gluten. I will have to try the bread again with either the same quantities of flours or maybe more whole grains. The crust was crackly crisp which I believe is because of the cast iron pan. Too many variables to know for sure. It is truly easy to put together, so if the 100% whole grain version turns out acceptable, it could become a regular.

-RPH