About Me

Friday, March 25, 2011

Naturally Sweet Wheat Bread

But actually, RPH's Multigrain Bread attempt

This bread was inspired by the Naturally Sweet Wheat Bread recipe from the 'King Arthur Flour Whole Grain Baking: Delicious Recipes Using Nutritious Whole Grains' book. However it included more bread flour than I wanted to use, so I decided to try some modifications. I don't think it all worked well, the end result was decent and I would want to try this again with some more changes. Because I changed this recipe quite a bit, I think I need to write out the changes.

The recipe

Original recipeRPH version
2 T orange juice
2 T water
2 T vegetable oil
1 T honey
¼C (1.5 oz) raisins
2 T (1 oz) packed brown sugar
Same as original except I only used
1 T brown sugar
¾ C lukewarm milk¾ C lukewarm milk
1¼ C (5 g) whole wheat flour
¾ C (2¾ oz) medium or white rye flour
1½ C (6.375 oz) unbleached bread flour
4.4 oz whole wheat (the last of the bag)
2.8 oz rye flour
3.45 bread flour
3 oz barley flour
0.25 oz ground flaxseed
0.20 oz vital wheat gluten
1½ t salt
2 t instant yeast
1½ t salt
2 t instant yeast
C = cup
T = tablespoon
t = teaspoon
g = grams
-

My flour measure was a tad short of the original recipe. Barley has significantly less protein content than bread flour, so I tried to to make up for it with some vital wheat gluten. I should have probably added some more, but I didn't want to make the bread too chewy.

Lots of ingredients in this bread

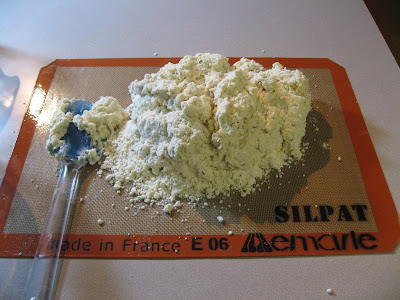
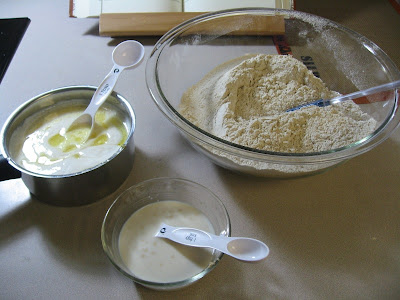
The ingredients from the first row in the table above are ground together until the raisins blend in. I didn't do a very good job so I had several biggish pieces of raisins left. I think it added interest in the final result. The flours, salt and instant yeast are mixed in a bowl.
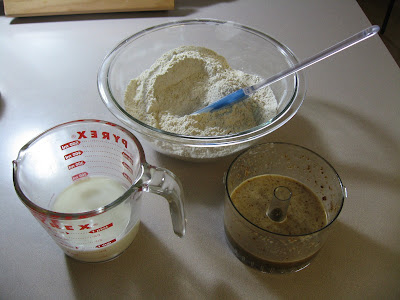
Milk, flours + salt+ yeast and liquid measure

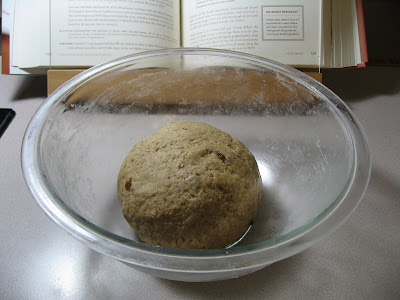
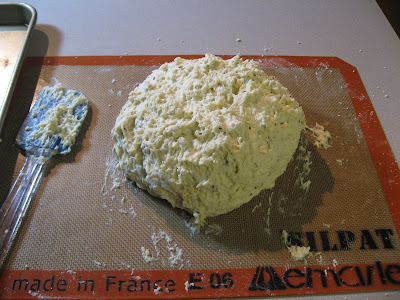
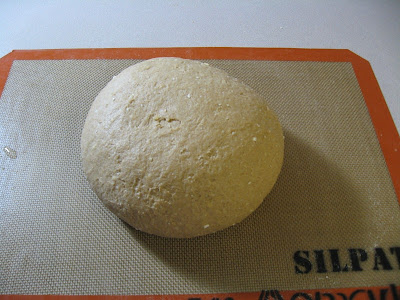
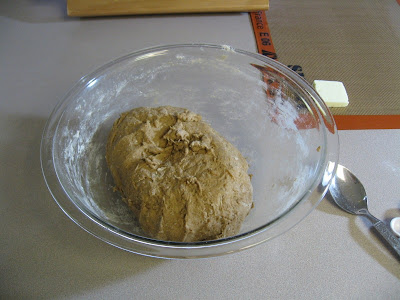
After mixing together and kneading for about 10 minutes

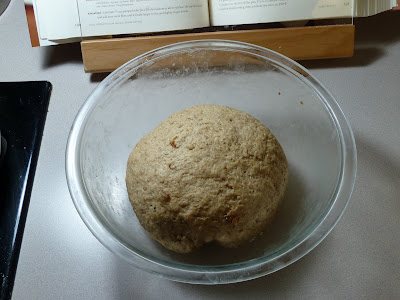
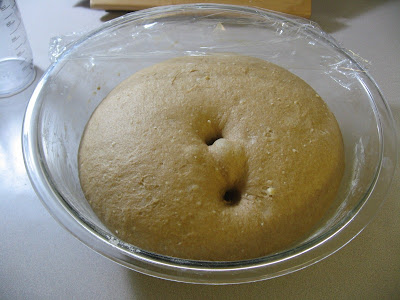
Decent rise after a long first rise

Second rise
The recipe did not suggest a second rise, but because I was using more whole grain flours, I decided to do a second rise to give the flavors time to develop.
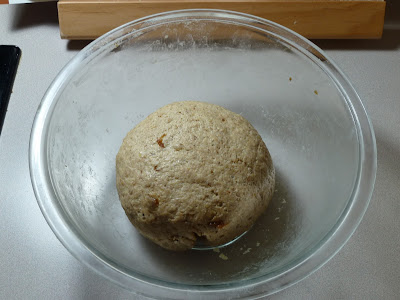
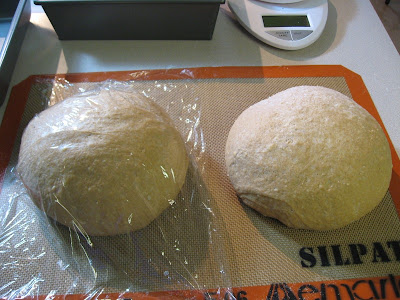
Deflated, rounded and ready for a second rise

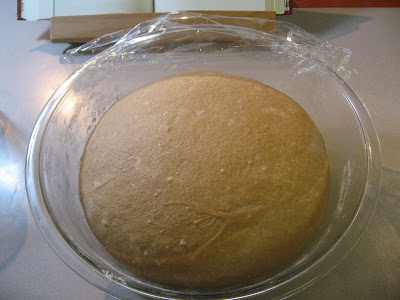
Not a significant second rise

Shaping and proofing
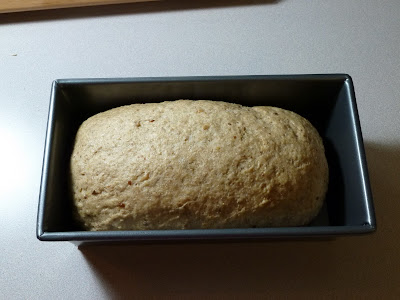
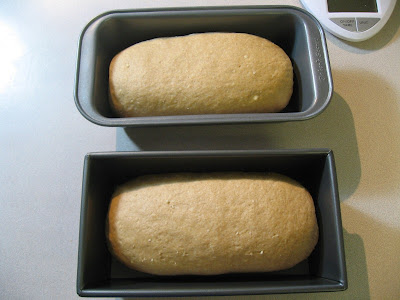
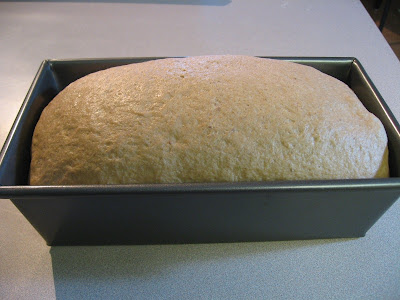
The dough filled the pan quite a bit less than my doughs usually do. Probably because 14ish oz of flour is less than usual and also because the dough hadn't risen much. After an hour and 45 minutes I thought it was time to go in the oven.

Shaped to a very small loaf

Barely filling the pan and not risen above the rim

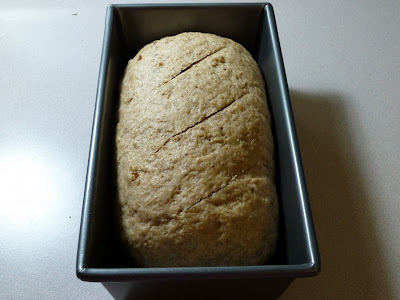
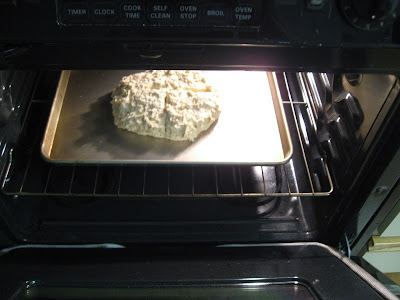
Slashed and ready for the oven

The bread
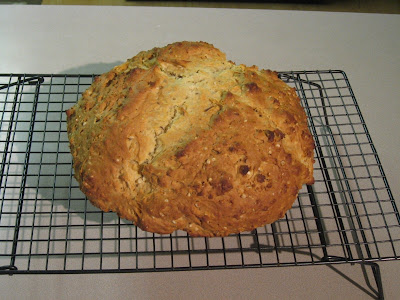
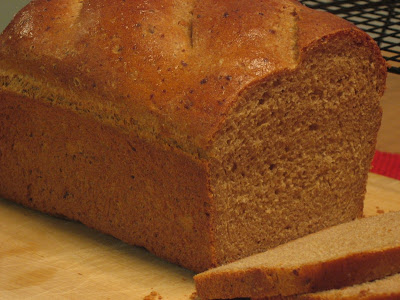
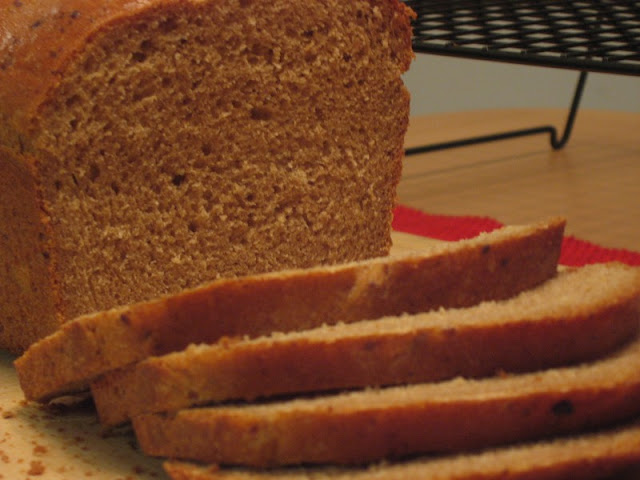
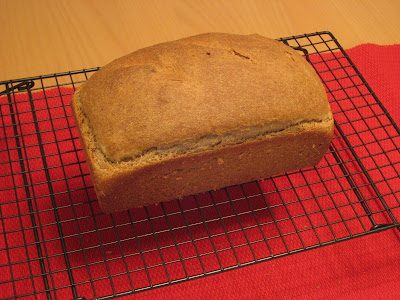
There was practically no oven spring. The bread sliced well. The crumb was fairly dense. The best part was the interesting taste of wheat, rye and barley. This bread was on the sweeter side and I am glad I used 1 T less brown sugar. Next time I would completely skip it. The bread was more suitable for nut butters and marmalade than savory sandwiches. We did have it with egg salad sandwich once and it didn't fall apart.

Tiny loaf is out of the oven and brushed with butter

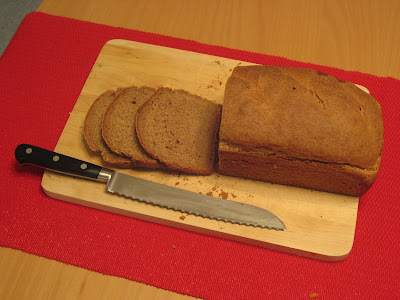
Sliced well and thin
Slices

Decent crumb with distinct flecks of raisins

Notes
Date: Mar 20, 2011
Recipe: Naturally Sweet Wheat Bread from 'King Arthur Flour Whole Grain Baking: Delicious Recipes Using Nutritious Whole Grains'

Flours: Whole wheat, rye, barley, bread flour
Bread specific ingredients: Raisins, orange juice, vegetable oil
Sweetener used: Light brown sugar, raisins, honey
Liquid: Milk

First rise time: 2 hours and 35 minutes
Second rise time: 90 minutes
Proofing time: 1 hour and 45 minutes
Comments: Not too bad for not following the recipe. I should try adding more vital wheat gluten when replacing bread flour with barley (or rye). I should probably have also added a little more liquid and made a slightly wetter dough. Barley flour probably absorbs more liquid than bread flour does. I felt it was very stiff as I kneaded but thought it would soften during the first/second rise. I should know better than that by now. The bread could also use less sweetener. Of course, then I would have to change it's name.

-RPH

Saturday, March 19, 2011

Caraway Soda Bread

This bread was baked for a potluck at work for St. Patrick's Day. I got the recipe here, and the writer, Elise, is right on when she says that the bread is 'so darn easy'. On a side note, I have been following Simple Recipes for a while now and am always excited when it features a vegetarian recipe. I've tried a few of them and they have all turned out quite well.

Because this bread should be eaten soon after baking, while warm if possible, I decided to bake this early in the morning before work. That would never have been possible with a yeast bread (agreed they taste best when properly cooled).

The dough
This bread uses all purpose flour, sugar, salt, baking soda, caraway seeds, butter and buttermilk. Butter is not a standard ingredient in Irish soda breads, but it helps make the bread very moist (cake-like, as some colleagues said). I would like to try to reduce the quantity of butter to see how it affects the taste/ texture.

I made 1.5 times the recipes in order to have enough bread for the potluck. I also had to soften the butter in the microwave as I didn't have the time to let it soften at room temperature. I ended up melting the butter.

Ingredients: Flour with salt, baking soda and caraway seeds mixed in.

The softened butter is mixed into the flour until the mixture is crumbly and then the buttermilk is added in.

After all the ingredients are mixed in

After a little more mixing / kneading

Baking

In the 450° F oven

After the specified 40 minutes, the bottom of the bread sounded hollow when thumped and it registered an internal temperature of over 200°. But I wanted to make certain it had cooked well inside (given the larger quantity of dough), so I let it sit in the (turned-off) oven for another 10 minutes.

One slash was deeper than the other

Unfortunately I don't have a crumb shot because the bread was cut at work. I read elsewhere that soda breads are supposed to be sliced thin. This one would not have been easy to slice thin. It tasted soft and moist, the caraway seeds were definitely a good idea. I got compliments from several colleagues.

Notes
Date: Mar 16, 2011
Recipe: Caraway Soda Bread from Simple Recipes

Flours: All purpose flour
Bread specific ingredients: Baking soda, caraway seeds
Sweetener used: Sugar
Liquid: Buttermilk

First rise: No rising
Comments:
It's a great recipe but unfortunately not whole grain at all. I will try to find a good balance of whole wheat and all purpose flour. Also, it would be nice to be able to use less butter. Caraway seeds were wonderful.

-RPH

Sunday, March 13, 2011

Featherpuff Bread

Another late post after another busy work week. I hope to not make a habit of this though. In keeping with Laurel Robertson's recipes I have been trying, this Featherpuff Bread had to happen sooner or later. It promises to be exceptionally light and airy, is protein fortified with cottage cheese and is of course 100% whole grain.

The dough
I made the given recipe amounts which is for two loaves. I would be giving one of the loaves to my father-in-law for his third month Christmas present. This recipe takes cottage cheese and eggs as the non-basic ingredients. It also uses powdered milk which I don't stock, so I used regular (1%) milk instead for the water measure. I halved the honey required because I didn't want to make a sweet loaf. Also, I replaced the butter with equal amount of vegetable oil.

The ingredients

The cottage cheese is warmed gently in a saucepan. The eggs, honey, (oil) and half the water (milk) are mixed in. The mixture should be about 80° F at this point. The active dry yeast is dissolved in water (milk in my case) in a separate bowl

The ingredients grouped and ready to be mixed

When I first put the ingredients together the small curd of the cottage cheese stood out and I wondered if it would stay so until the end.

After getting the ingredients mixed in

However after the 20 minute kneading period, the curd had blended in well, with only tiny specks visible.

After 18 minutes of sincere kneading

Rising
The dough rose very well, faster than expected. It is hard to measure 'volume doubling' in a bowl, but the wet finger poke test clearly passed. Also, LR warned about not waiting too long for this dough, to move on before the 'sighing' stage.

After the first rise

Deflated, rounded and ready for the second rise

Second rise is done

Shaping and proofing

Split into two, rounded and rested

Shaped and ready for proofing

I had pressed down the loaf in the upper pan fairly firmly trying to flatten it to the edges. It ended up rising unevenly and spreading out over the rim of the pan. The loaf in the lower pan was shaped minimally. It rose evenly, maybe not as high as the upper pan. The two pans might vary in volume too, I have not tested that.

Proofed well

Slashed and ready for the oven

Out of the oven and registering a good 207° F

The bread

Brushed with some butter

Sliced well.

Oven spring along the sides as well as the top.

Crumb shot

The crust was thin and crisp and the bread did feel light and airy when first sliced. However, I made the mistake of leaving the bread in a container with the lid half open for over a day. I believe that caused the bread to dry out. It could have also been the quality of cottage cheese. LR's book was written in 1984, maybe cottage cheese used to be a little different then? Or it could have been because I used oil instead of the butter (Although I don't think so). The bread sliced okay after that but the slices would fall apart way too easily. I think it is a good candidate for some homemade bread crumbs, or altus in one of PR's recipes.


Notes
Date: Mar 3, 2011
Recipe: Featherpuff Bread from Laurel Robertson's book, 'The Laurel's Kitchen Bread Book'

Flours: Whole wheat flour
Bread specific ingredients: Cottage cheese, eggs
Sweetener used: Honey
Liquid: Milk

First rise: 80 minutes
Second rise: 45 minutes (followed by rounding and 20 minutes of rest)
Proofing time: 50 minutes
Comments:The bread baked at 325° F for 45 minutes. A lower temperature is needed because of the dairy and eggs in the recipe. I didn't add any vital wheat gluten this time. I halved the honey and used oil instead of butter. I used a total of 1 C milk instead of the 1 C water and ½ C powdered milk. In the introduction to this section in the book LR mentions that they wouldn't use more than ¼ C per two loaf recipe, so this high content surprised me a bit. I didn't have powdered milk to use anyway. (I read online that the usual reconstitution for powdered milk is 1 : 4 (dry milk to water). Mine worked out to lesser than that.)

I had said in an earlier post, not long ago, that I would be making more LR breads (vs PR breads). But I am changing my mind about that. As much as I like that LR's breads look great and work with less fuss than PRs recipes, I do think that PRs breads have a better, complex flavor whereas the three LR breads that I have made recently, all tasted more or less the same. Agreed, they were all wheat flour only + some diary and they tasted good, just not necessarily 'interesting'. I need to find a good multigrain recipe in LR's book or I might go back to PR for another shot at his multigrain struan.

I didn't bake a bread this weekend. (I made some morning glory muffins, in loaf form, from Cooking Light Way to Cook Vegetarian... and they are yummy). I missed baking bread, but I confess that it made my weekend more relaxed (Also in part because I decided not to cook the couple advance meals for the coming week like I normally do). I will be making Irish Soda Bread on Tuesday for a potluck at work on Wednesday (A day earlier than St. Patrick's day, I know). Any suggestions for good soda bread recipes to consider besides the couple that I have already shortlisted here and here? My first and only soda bread recipe was quite changed from the original in order to make it whole grain and although I would gladly eat it again, I'm not sure how a crowd would like it.


-RPH

Saturday, March 5, 2011

Golden Date Bread

Late again to post this, but the week was fairly busy. This bread was made the same time as the No-knead Ciabatta. The recipe is from Laurel Robertson's book, 'The Laurel's Kitchen Bread Book', which has become the new go-to book for bread these days. The recipes are done within the day but require substantial amount of kneading.

Dough
The Golden Date Bread recipe, uses pitted dates for the sweetener, the rest of the ingredients are the usual; whole wheat flour, yeast, salt and butter. The recipe suggests ½ C (89 g) of pitted dates for one loaf but says the quantity could be halved for a less sweet bread. I used 4 large medjool dates, which came to about 60 g. I was lazy to cook them with water in a saucepan, I microwaved them, in 3 rounds of 1 minute each (Thankful that I had kept a screen over the container). The mixture didn't blend into a gooey mass like the book said it should be, so I blended them a bit with a hand mixer. The saucepan method would probably have worked better.

Ingredients ready.

The mixture was supposed to cool enough to not kill the yeast, I waited till it was about 103° F. When mixing the dough, it seemed much warmer than usual and I was afraid it would kill the yeast. So I kept the bowl in the fridge for about 4 minutes. I'm not sure if that did anything.

Barely mixed in, before autolyzing (resting) for 5 minutes

The butter was mixed in towards the end of the 20 minute kneading.

Ready for the first rise

Rising
The bread hadn't risen impressively after 90 minutes, but a wet finger poke suggested that it was done. So I reshaped it and let it rise again. Normally the second rise takes about half the time of the first rise, but I decided to let it rise longer, about 70 minutes.

After the second rise.

Shaping
I'm getting better at shaping the dough using LR's method. This dough ended up proofing for pretty long because I had something else consuming the oven. At this point my expectations from this dough weren't very high. I messed up the slashing as well.

Shaped

Much longer rise time than usual

Poor slashing

The bread
Surprise, surprise! Oven spring! The bread registered a good 207° F after 45 minutes so I got it out, but it wouldn't release from the pan. After waiting for 5 or so minutes I loosened it a bit with a spatula (note the rough sides on the loaf). I put it back in the oven (turned off) for 5 minutes to strengthen the sides (not sure that did anything)

Surprise oven spring

Sliced decently well.

The tofurky sandwiches we made with the thin slices fell apart a bit. The almond butter sandwich was wonderful. There isn't any extra sweetness from the dates, they just replaced the honey I would normally use.

Decent but crumbly crumb

Notes
Date: Feb 27, 2011
Recipe: Golden Date Bread from Laurel Robertson's book, 'The Laurel's Kitchen Bread Book'

Flours: Whole wheat flour
Bread specific ingredients: Pitted chopped dates
Sweetener used: Dates
Liquid: Water

First rise: 90 minutes
Second rise: 75 minutes (followed by rounding and 10 minutes of rest)
Proofing time: About 100 minutes
Comments: Next time I will cook the dates in a saucepan and be more patient for the date mixture to cool down sufficiently. Added 1 tsp vital wheat gluten to help with the rise. The recipe suggests using sesame oil instead of the butter and adding sesame seeds to the dough to make a Date-Sesame Bread (dates supposedly are dynamite with sesame). That might be interesting. I also want to try to make LR's breads with vegetable/canola oil instead of butter.

Time to go make a sandwich for lunch.

-RPH
Tuesday, March 1, 2011

No-knead Ciabatta

I'm not sure how I ended up on this Ciabatta recipe on this website, but the video made it seem like this was the easiest way one could ever make bread. It did not use any whole grain flour at all, but I wasn't willing to believe the claims of a good ciabatta bread that was so easy to make. So I had to try it. Also, I thought it would be a good bread to share with colleagues at work.

Dough
This recipe involves the minimum of ingredients for bread: flour (4 cups bread flour), only a tiny amount of yeast (¼ tsp, I've never made bread with such little yeast before), salt (1½ tsp) and water (2 cups). The trick is in letting the dough ferment and rise for a whole 18 hours at room temperature. So it does take a little planning and implementing before the bread is ready to eat.

The ingredients for Ciabatta

All the ingredients put together and mixed well

After 18 hours of rising, lots of bubbles of gas have developed

Dough out on a piece of saran wrap on a wet counter

Modifications
I wasn't going to make this bread often (unless I can find a whole grain recipe with similar results... unlikely), so this was my (only) chance to do some experiments. I decided to split the dough and add some garlic infused olive oil and some cheese to smaller pieces of dough. Peter Reinhart gives some variations to the basic Ciabatta recipe in his 'The Bread Baker's Apprentice' book.

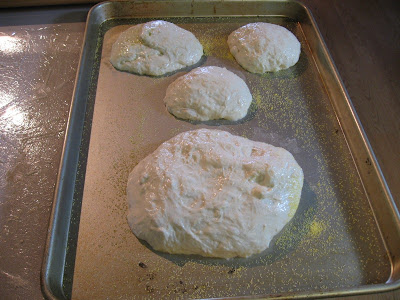
In the picture below, the piece farthest away and to the left had the garlic infused oil. I patted down the dough, added the oil and folded the dough over itself several times in different directions trying to enclose the oil in but it kept seeping out. The piece farthest away to the right had a shredded cheese filling (a mix of Cheddar, Parmesan and Pepper Jack). The small piece in the center has a mix of oil and cheese. The piece closest is the basic dough, roughly rounded. The shape is usually not important.

Different experiments in progress.

Proofing
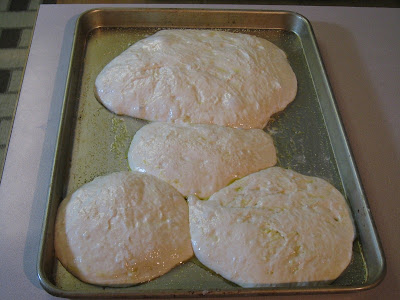
As expected, the dough spread horizontally, and unfortunately, the pieces blended into one another. The right way to handle multiple pieces of dough, or to get nicely shaped bread, is to use a proofing cloth as shown in this picture to control the shape of the dough as it rises. I don't own a couche, I could have used parchment paper but I was lazy. Oh well.
I should mention here my other big mistake; not greasing the baking sheet with enough olive oil and dusting with enough cornmeal. I think I used less flour on the dough as well.

After proofing for a little over two hours (pan rotated compared to the picture above)

Baking
This bread bakes in a 425° F for 35 minutes. It helps to have moisture in the oven, so I used PR's steaming technique; a cup of water poured in a preheated pan just before putting the dough in. As the water evaporates, it creates steam in the oven. This is a weak attempt to create conditions in a commercial baker's oven, but it helps for doughs that are not enriched (no dairy, sweetener or fats), especially free-form doughs.

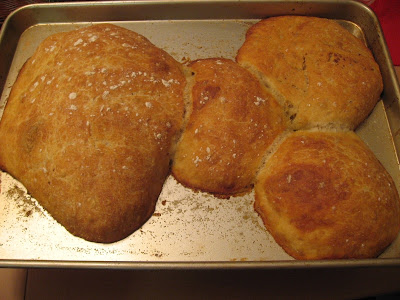
Out of the 425° F after 35 minutes

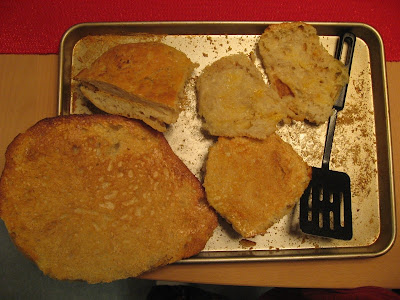
Releasing the bread from the baking sheet was quite a task
with lots of scraping, coaxing and some anxious moments


The piece with oil and cheese split right open but was yummy

Cross section of one of the smaller pieces with some nice holes

Some very good sized holes in the big piece of basic dough

Result
I was pleasantly surprised how well the crumb turned out. I should have taken a few more pictures of the crumb.The crust was thin and crackly. If consuming white flour bread fit my eating philosophy, I would be baking this bread all the time. There is a recipe in the King Arthur baking book I have, also described here, that uses part whole wheat flour (Thank you cellarguy for pointing me to it). I will be trying that recipe sometime soon.

Notes
Date: Feb 27, 2011
Recipe: No-knead Ciabatta from this website

Flours: Bread flour
Bread specific ingredients: None
Sweetener used: None
Liquid: Water

Long ferment: 18 hours at room temperature
Proofing time: A little over two hours
Comments:Very easy to put together, truly no knead, great crust and crumb. I should remember to grease the baking sheet liberally and use plenty of cornmeal / flour on it before placing the dough. If making multiple pieces I need to use a parchment paper couche to help the pieces rise a little more vertically.

-RPH